Product Overview
This is the second step to finish creating your new experience.
After finishing the required fields of your product settings, the second step to finish your new experience is adding some important information in product overview. If you need more help with Product Settings, please take a look at this article. This article will walk you through the product overview page.
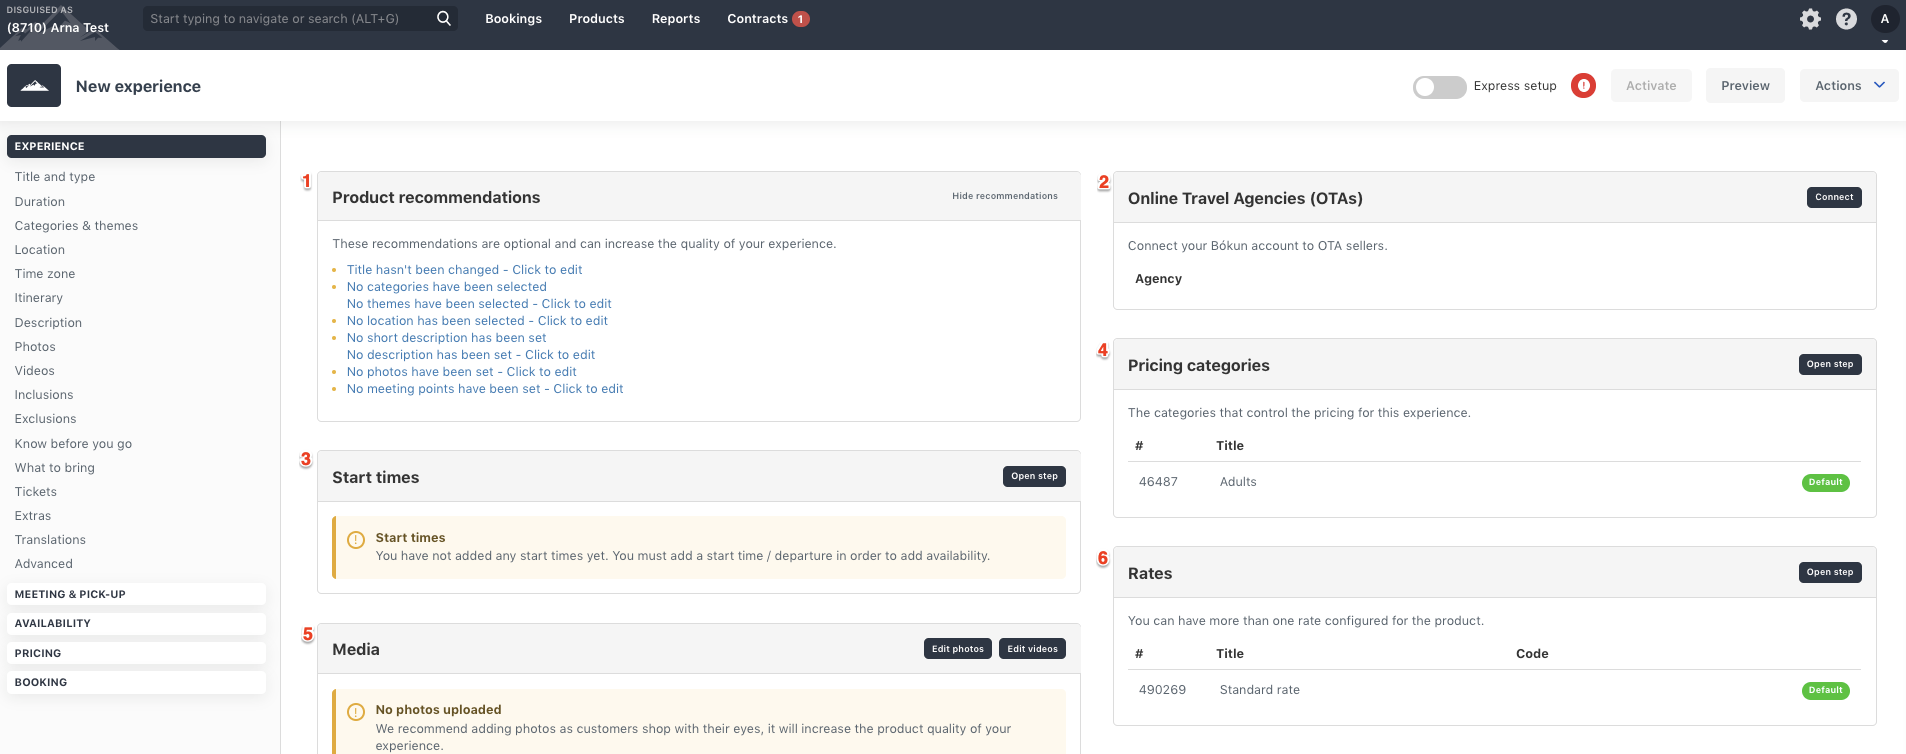
This is what you see when you are on the Product Overview Page.
On the left, you will find:
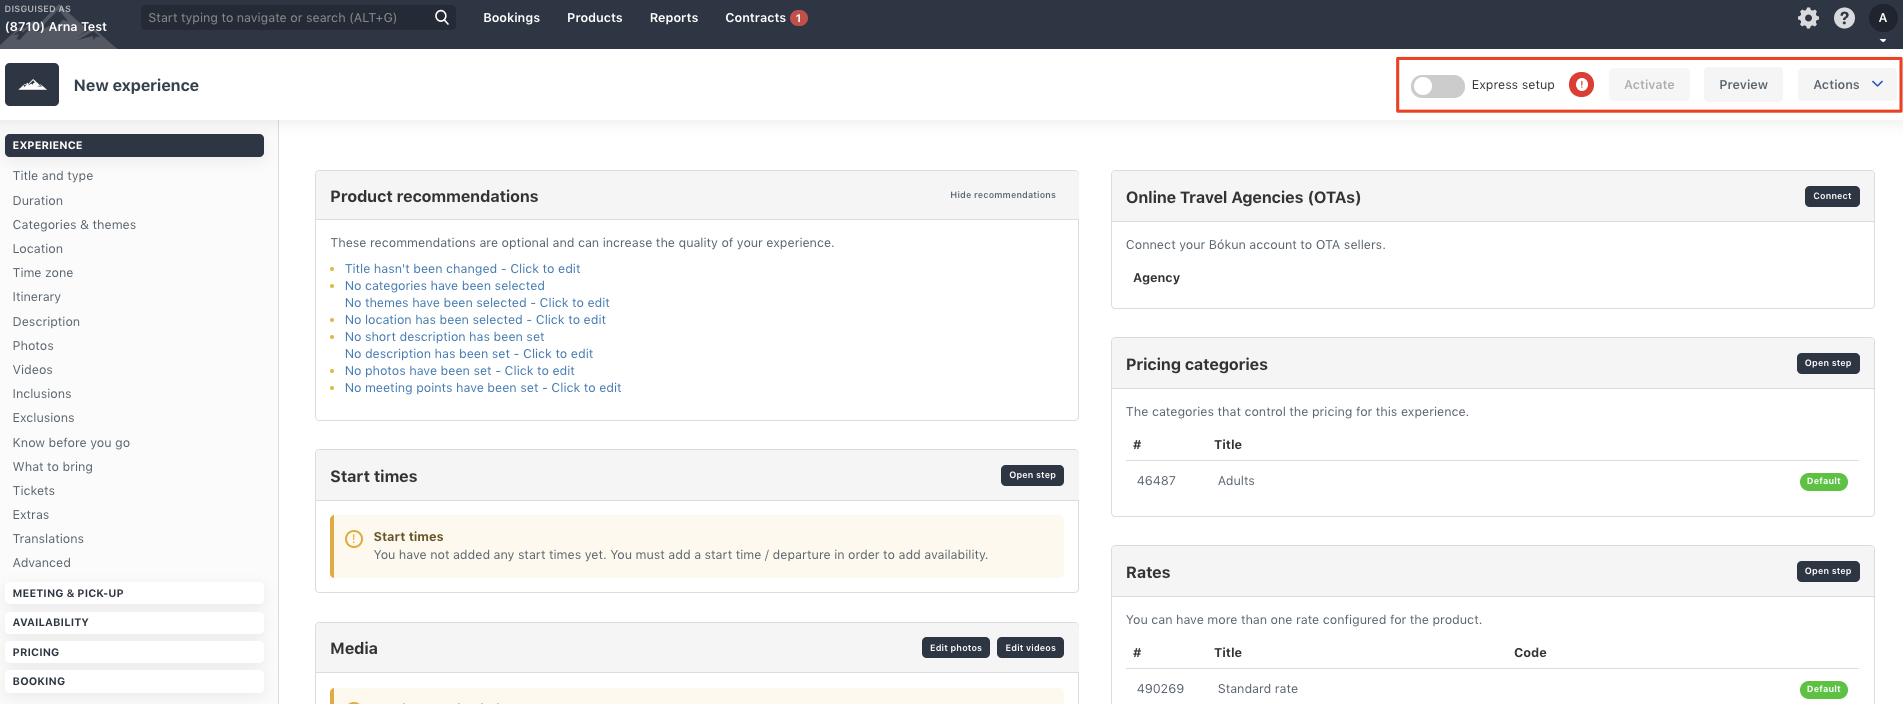
Express Setup: Toggle this option if you only want to set up the required elements of an experience.
In the top right corner, you will find:
Activate: Click on the button in the top right when you are done creating your experience to make it active.
Preview: Click this button if you want to preview your experience to see how it will look to customers when they use a booking engine.
Actions: Gives you access to a range of options such as close outs, automated messages, clone, audit trail, and a link to update from Viator.
Product Recommendations: Bókun will recommend that you fill in any missing information in experience settings. You can hide the recommendations by clicking on Hide recommendations.
Online Travel Agencies (OTAs): This shows you if you are connected to any OTA. Clicking Connect will bring you to the OTA page found under Sales Tools in the main menu bar. Learn more about OTAs here.
Start times: The start times for your experience will appear here. If you need to edit the start times, click on Open step in the top right corner. Learn more about start times here.
Pricing categories: The pricing categories your travellers choose at the time of booking, e.g. adult, child, infant. Learn more about pricing categories here.
Media: You can add experience photos and videos here. Note: photos will appear in widgets, but the video will only appear if you are connected to Bokun's API service. Learn more about media here.
Rates: If you need to differentiate different pricing tiers or tour options, you can create the rates by clicking open step. Learn more about rates here.
Booking questions: You can create booking questions that your customers have to answer during the booking process here. Click open step to add questions. Learn more about booking questions here. Learn more about booking questions here.
How to get there: You can identify where your customers can get picked up from. Click open step to add pick up places. Learn more about pick up places here.
Display Settings: These settings are for how your pick up places, route map, and rates display on your booking engine.
Itinerary: You can add an itinerary of your experience here by clicking open step. This is optional. Learn more about itinerary settings here.
Route: If your experience has a specific route it follows you can add the route here. This is optional. Learn more about route settings here.
Partner services: If you have teamed up with partners, you can add your partner here. Learn more about partner services here.